-------------- UPDATE! --------------
AE and Editor Noah Chamow has created a macro that is extremely comprehensive and automates this process even further. He offers it for free (though you should donate!) through his site: http://www.avidsupergrouper.com/
I highly recommend you learn to multigroup by hand before automating. Learn the process and then check it out!
---------------------------------------
Thanks to Vinnie Manierre and Rob Kraut for providing this information/collaborating with me and thanks to some other very talented post production gurus and AEs as well, including Vincent Rocca and Tim Leavitt.
Multigrouping is the process in Avid of combining multiple camera angles and external audio files into one special clip referred to as a “Multigroup”. With a Multigroup clip, you can quickly and easily change camera angles in your timeline.
--> This written/video tutorial will teach you how to multigroup by hand and with a keyboard macro program from start to finish.
If you’d like to follow along, download this zip file which contains the example video and audio files: https://www.dropbox.com/s/mg922whzgwt5b1b/ASSETS.zip?dl=0
If you prefer to watch a video to learn, you can see the entire Multigrouping process in action below. There will also be video links to the various steps throughout the written tutorial:
TUTORIAL TABLE OF CONTENTS
STEP 1: SET UP YOUR PROJECT
STEP 2: CREATE A SYNC MAP
STEP 3: USE PLURALEYES TO CREATE A SYNC MAP
STEP 4: CREATE ADD EDITS
STEP 5: CREATE YOUR MULTIGROUPING KEYBOARD
STEP 6: PREP THE COMPOSER WINDOW
STEP 7: PREP THE MULTIGROUPING CUSTOM BIN VIEW
STEP 8: MULTIGROUPING BY HAND
STEP 9: CREATE YOUR MULTIGROUP
STEP 10: AUTOMATE THE MULTIGROUPING PROCESS
STEP 11: CHECK YOUR MULTIGROUP
Let’s get started.
STEP 1: SET UP YOUR PROJECT [video tutorial link]
Create a new project with these settings:

Create two bins in your new project, one called “AE Work” and another named “ASSETS”.
Open the ASSETS bin and import the contents of the corresponding ASSETS folder from the zip file above. Choose all of the video/audio files contained within and import them at your preferred DNxHD resolution. For our purposes, DNxHD 45 will be fine.
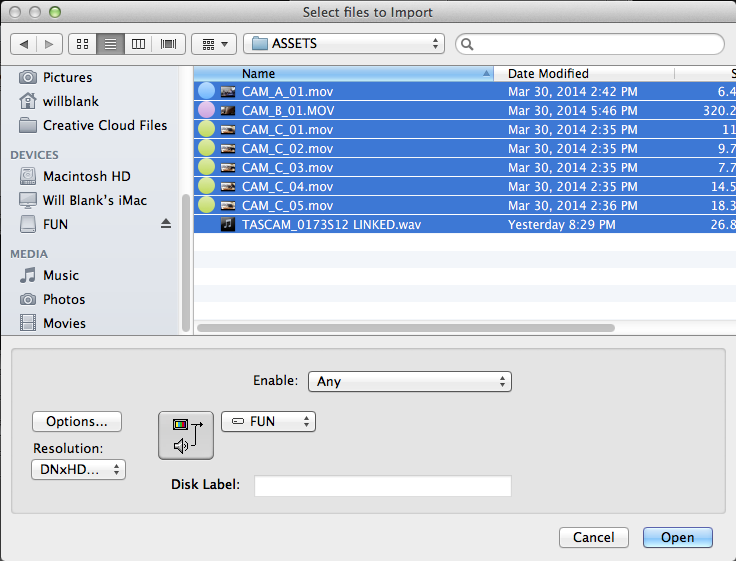
Once the files have finished importing, you can close the ASSETS bin.

Now open the AE Work bin.
STEP 2: CREATE A SYNC MAP [video tutorial link]
In the AE Work bin, create a new sequence entitled “Sync Map”.
This “Sync Map” sequence is where we will arrange and sync up all of the various video and audio clips. This can be done by hand, by timecode or with a piece of third party syncing software.
One of the best/easiest ways to create a sync map is to use Pluraleyes, an application that will take your reference audio, analyze the waveforms, and sync all of your clips up to external audio in seconds.
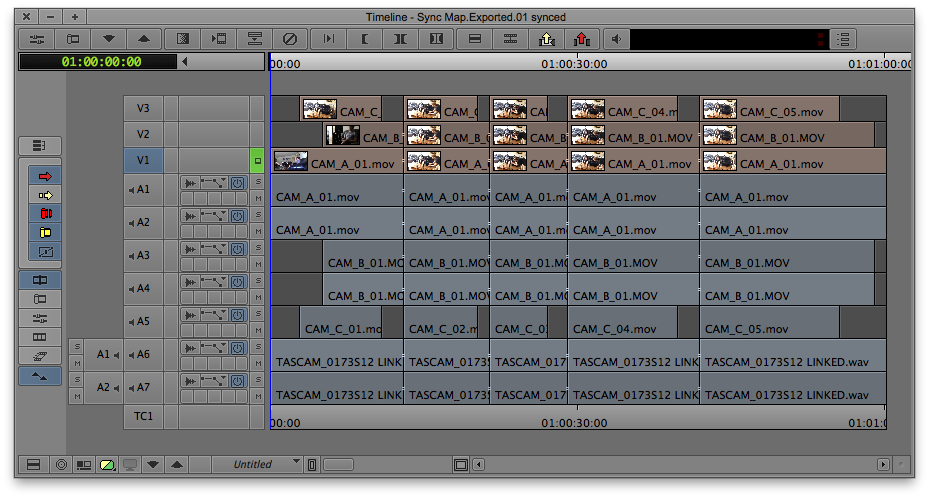
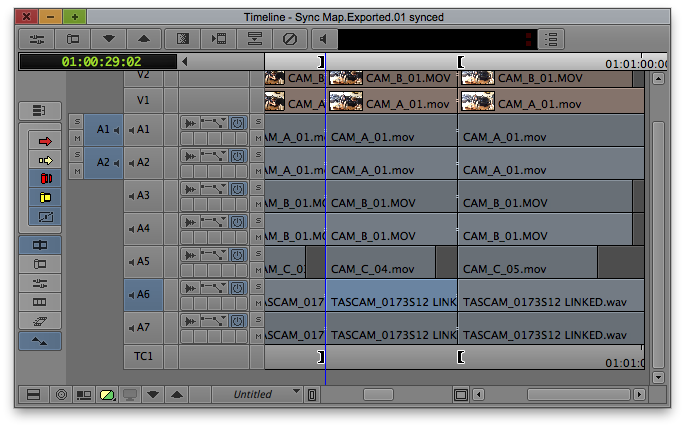
To begin, lay in all of your clips from the ASSETS bin to the timeline, starting with Camera A and working your way up to Camera C and then the external audio. You will likely need to create new video/audio tracks to accommodate. Your timeline should look like this when finished:
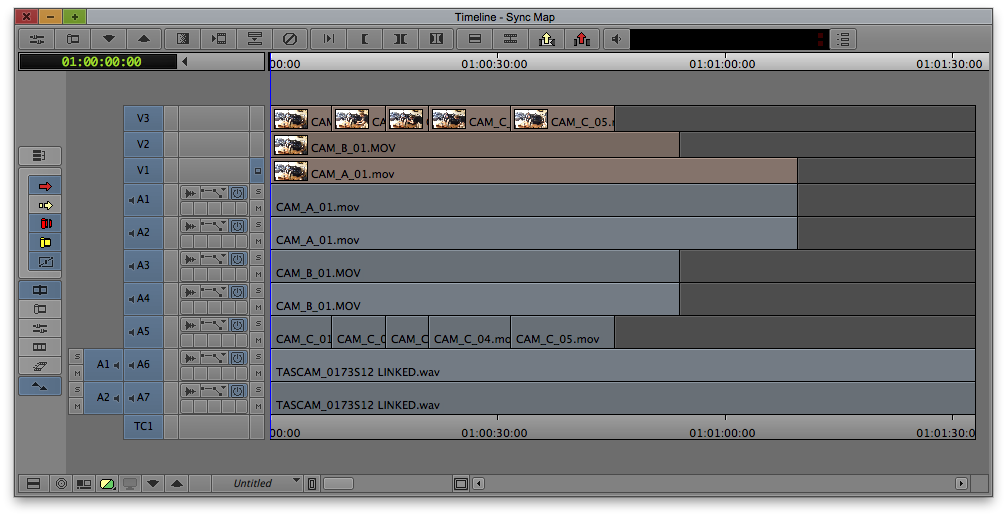
To sync these clips by hand, you will need to identify a good sync point, whether it be a slate or a random movement that is identifiable across all three video clips. You will then work from the base clip upwards, moving and checking sync as you go.
By the end of the process, your timeline should look like this:

Syncing by hand can be tedious and sometimes is your only option. Thankfully, the example clips I provided have reference audio attached. We can use this “in camera” audio to sync to our external audio with Pluraleyes (3.0 and above).
STEP 3: USE PLURALEYES TO CREATE YOUR SYNC MAP [video tutorial link]
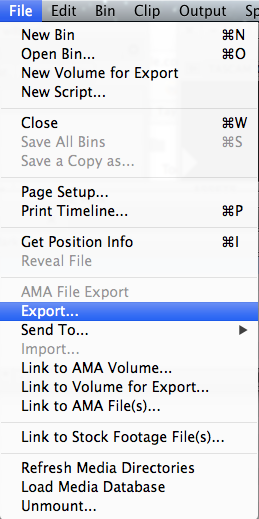
With all of your clips placed in the timeline and the timeline active, click on the File Menu and select “Export”:
In the following window, click the drop down menu and change it to AAF.
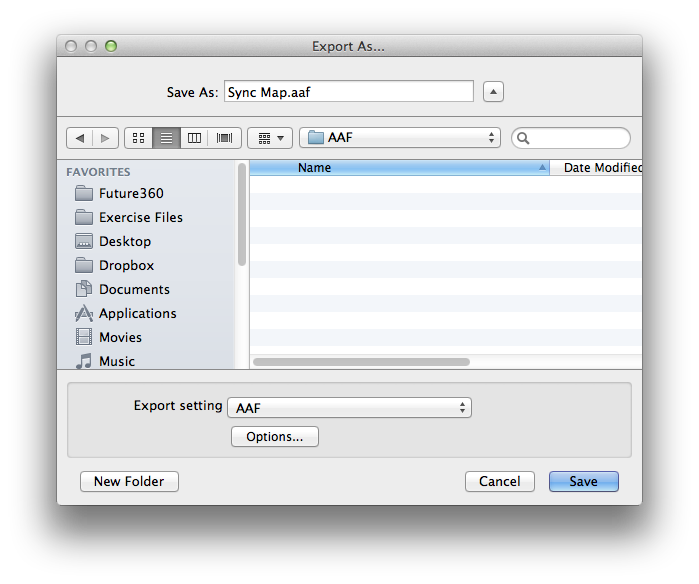
Make sure your settings match the image below:

Click Save. Then save the AAF file wherever you prefer.
Now open Pluraleyes. Click File → New Project from Media Composer.

In the following window select your AAF.
Your timeline should appear and populate the Pluraleyes timeline, looking like this:
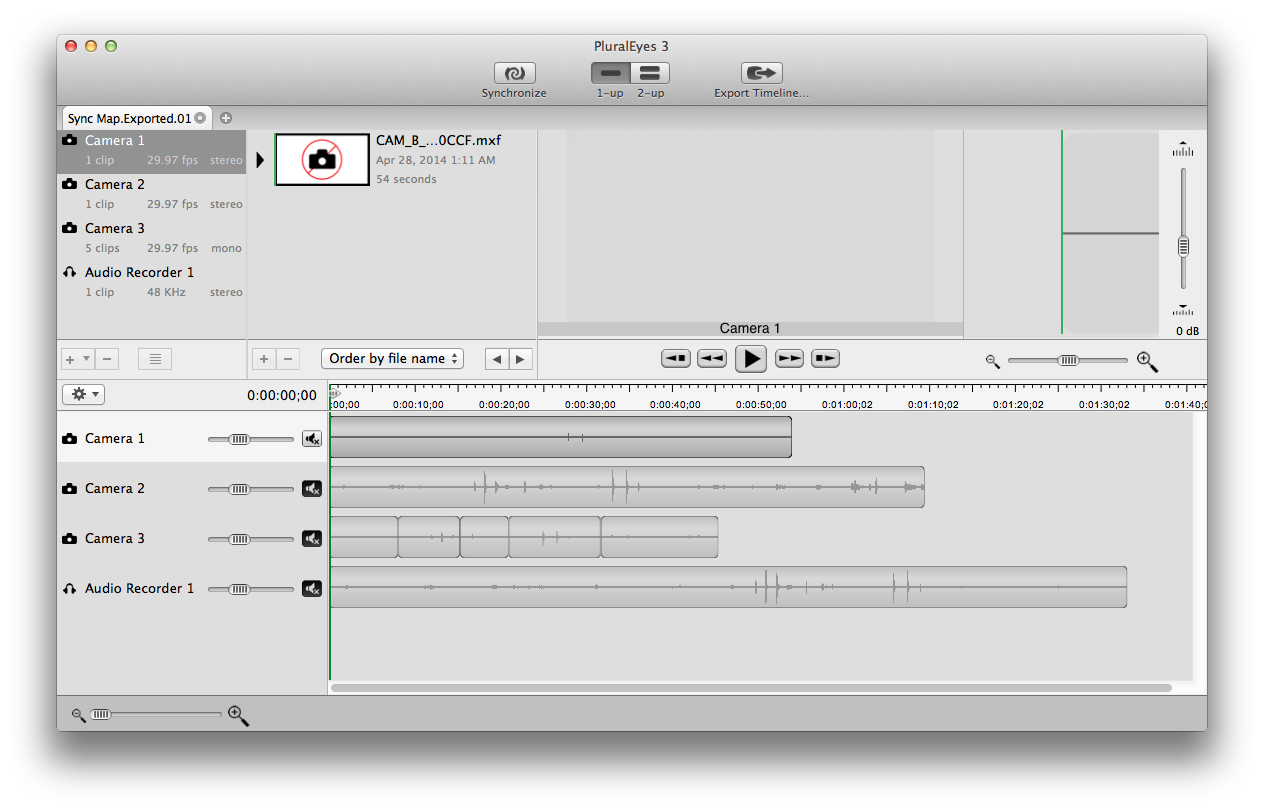
Click the “Synchronize” button.
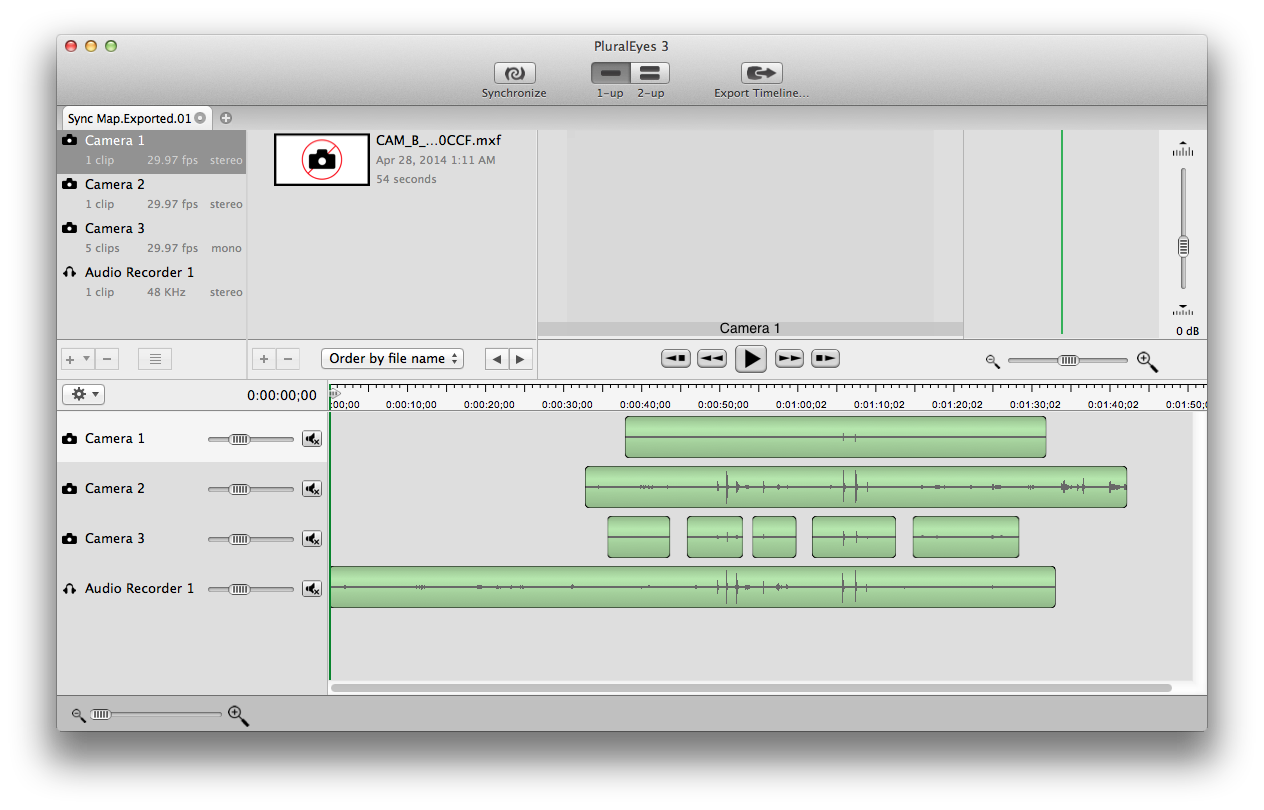
The pluraleyes timeline should now look like this:
With the clips synced you can click File → Export.

A window will pop up indicating you are exporting an AAF to Media Composer:
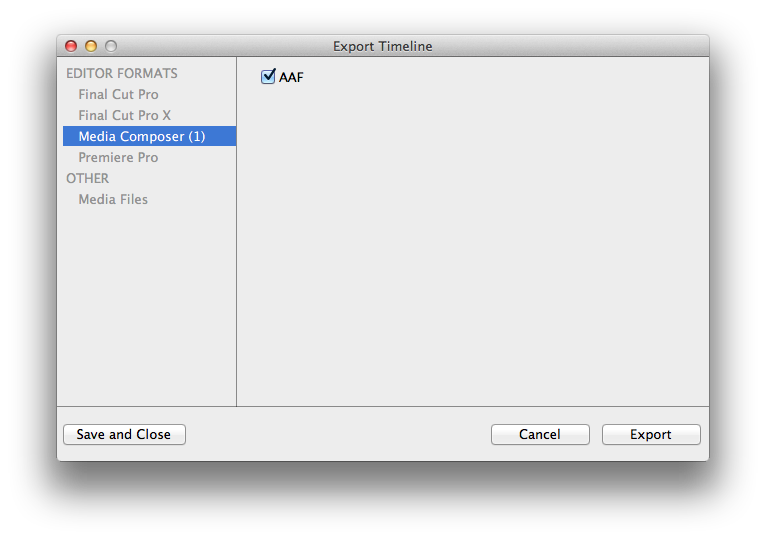
Click “Export”. Another window will pop up indicating that the process has completed.
 You can now select the highlighted sequence and drag it into your bin:
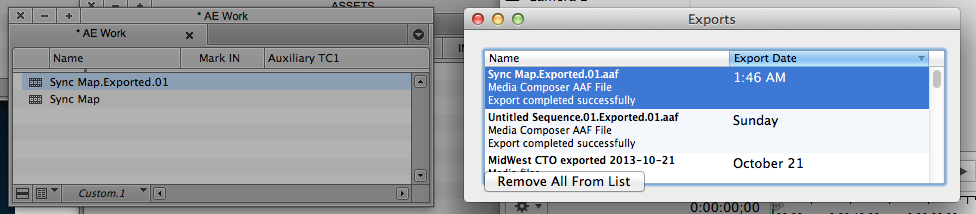
It will import a sequence entitled “Sync Map.Exported.01 synced”. This is the sequence we will work from going forward:
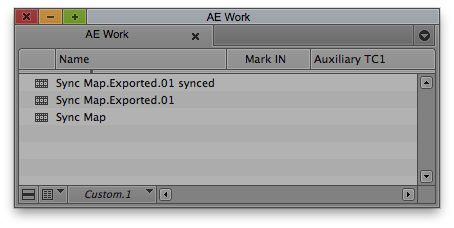
For our purposes, you will no longer need the “Sync Map.Exported.01” sequence or the original “Sync Map” sequence. Place them in another bin.
Now your AE Work bin should look like this:
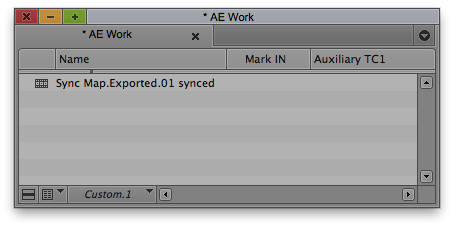
It’s also a good idea to keep a backup of the completed sync map, which you can store wherever you like. Now double click and open your synced sequence:
STEP 4: CREATE ADD EDITS [video tutorial link]
Because of the way in which Avid creates multigroups, you will need to divide your sync map into digestible chunks.
The general rule for creating Add Edits:
One clip instance per camera/external audio clip, per group.
Relatively easy to say, harder to visualize.
Here is our sync map. I trimmed the front and back ends of the audio clip so that our timeline now begins with the first video clip:
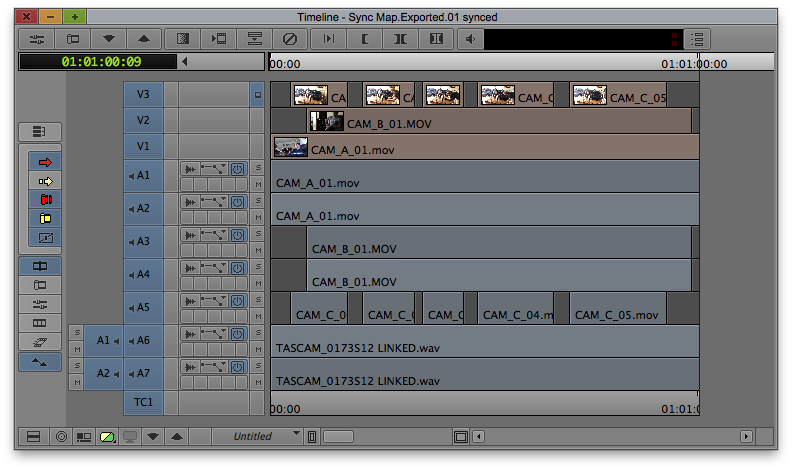
And here is the same timeline with Add Edits, represented by red lines:
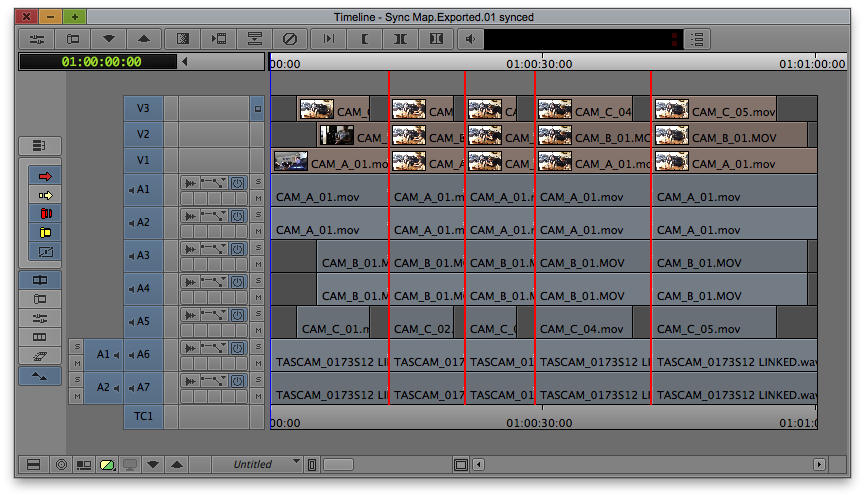
I am only making an Add Edit when it is necessitated by a new instance of a clip, whether it be camera 1, 2, 3 or external audio. In this case, the Add Edits are prompted by the trigger-happy operator of camera 3.
To make it clearer, I numbered the "groups" of clips. Avid likes its multigroup subclips in stacked, one-clip-instance-per-track portions. You'll notice that no cameras or audio clips have multiple clip instances in any of the "groups":

With those Add Edits, your sync map is complete.
If this concept is still confusing, please refer to this tutorial which features a demonstration video walking you through the logic of each Add Edit: http://willblanksblog.blogspot.com/2013/07/the-best-way-to-create-add-edits-for-multigrouping.html
Now that we have our completed sync map, there are some small steps you need to take in order to prepare Avid for multigrouping.
STEP 5: CREATE YOUR MULTIGROUPING KEYBOARD [video tutorial link]
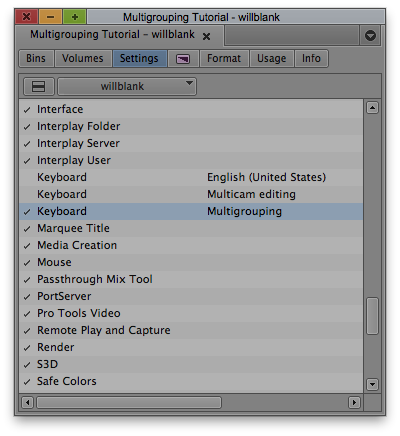
Create a custom keyboard that looks like the one below and activate the setting by clicking the checkmark next to it in the settings tab of your project window:
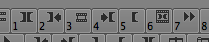
Mark Clip
Go to In
Match Frame
Go to Out
Mark Out
Create Subclip
Fast Forward
STEP 6: PREP THE COMPOSER WINDOW [video tutorial link]
Double click “Composer” under the Settings tab in the Project Window. Make the FF/REW tab look like this:
 STEP 7: PREP THE MULTIGROUPING CUSTOM BIN VIEW [video tutorial link]
Open the AE Work bin. Click the hamburger menu in the lower left hand corner and select “Choose Columns…”

In the following window, select ONLY “Mark in” and “Auxiliary TC1” and click OK.
Click and drag to arrange the columns in your bin to look like this:
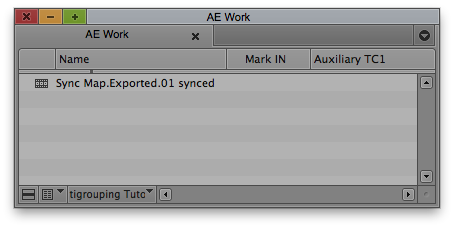
Click the third box from the left in the bin window and click “Save As”:
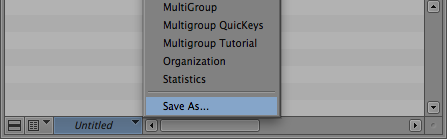
Enter the name “Multigrouping” and click OK. Now you can return to this custom view whenever you like.
STEP 8: MULTIGROUPING BY HAND [video tutorial link]
Now we are ready to multigroup.
There are two ways to do it: the first is by hand, manually. The second is using a piece of software called QuicKeys, which will allow you to automate the process. I recommend learning to multigroup manually first. Once you feel comfortable with and understand the process, you can move on to QuicKeys and learn to automate the process.
NOTE: YOU MUST DEACTIVATE SEGMENT/OVERWRITE TOOLS FOR THE MULTIGROUPING PROCESS TO FUNCTION PROPERLY. Otherwise the timeline indicator will get "stuck" on individual clips.
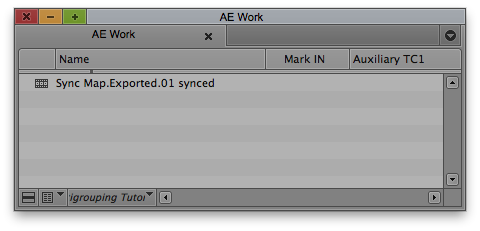
To begin, make sure your AE Work bin looks like this, with your sync map sequence as the only item in the bin:
…and make sure that your Multigrouping keyboard is activated in the Settings tab of your project window:
In your sync map sequence, move the playhead to the beginning of the timeline. Deselect all video tracks except for V1, then hold the Command key and click the Monitor button to solo the track. Its icon should turn green and your timeline should look like this:
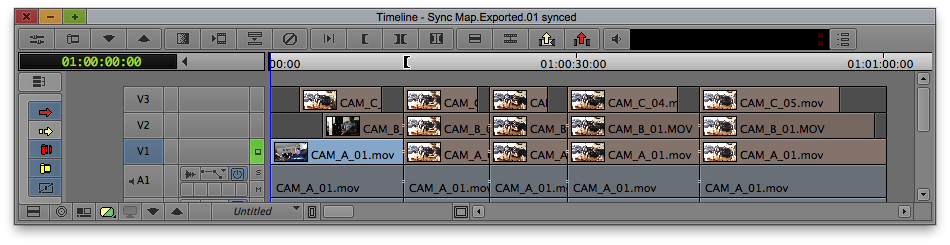
Now press the “1” key on your keyboard. It will mark your first clip on V1.
Press “2”. This will “Go to In”-- making sure your timeline indicator is at the head of your clip.
Press “3”. This will match frame back to your source clip and activate the source monitor. By default the in point from your timeline will be set on the corresponding source clip:
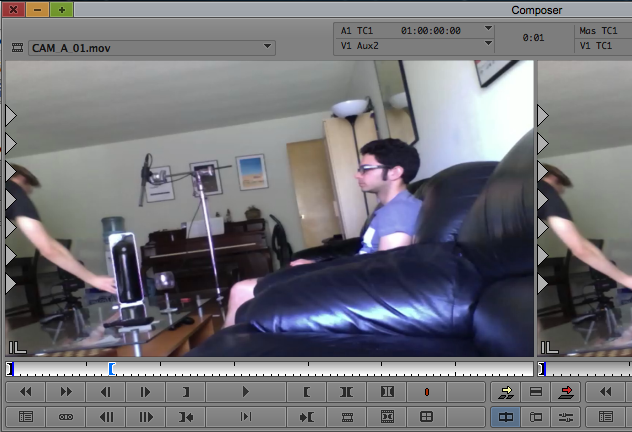
Press “4”. This will Go to Out aka the out point from your timeline on the source clip:
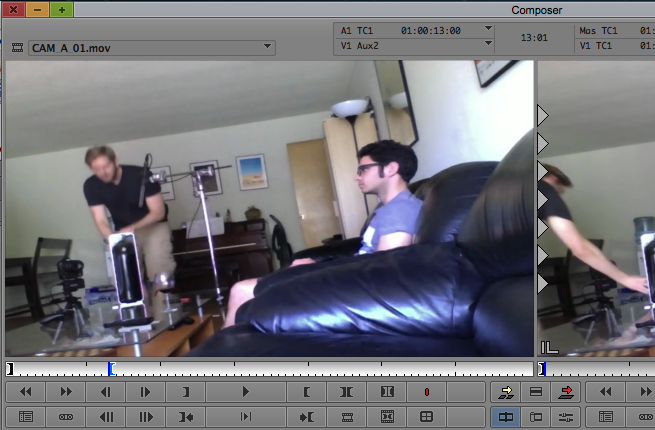
Press “5”. This will Mark Out on the source clip:
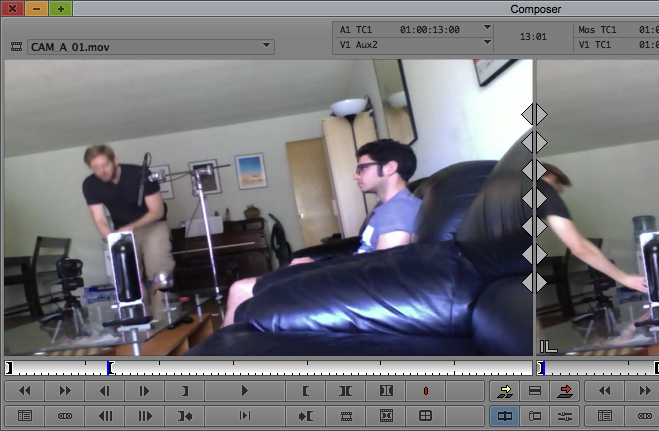 Press “6”. This will create a subclip in your AE Work bin:
 Now you will copy the contents of the Sync Map.Exported.01 synced sequence’s Mark In column and paste it over to the Auxiliary TC1 column of the subclip:
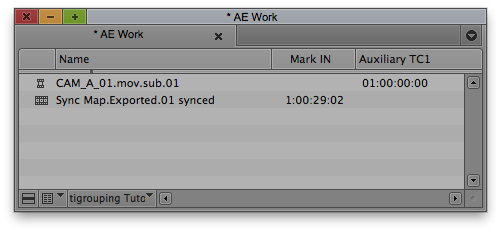
NOTE: Auxiliary timecode is what Avid will use to stitch the various subclips together and form the multigroup.
Return to the timeline by pressing Command + 0. Alternately you can click to reactivate it.
Press “7”. This will take you to the next Add Edit:

Repeat the above process to produce another subclip. Your bin should then look like this:
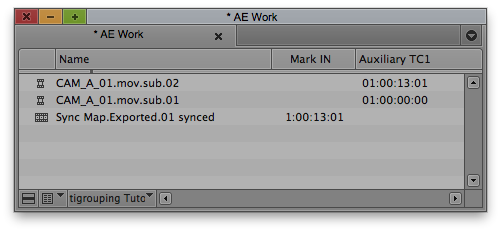
Repeat this as many times as necessary per video track, always isolating the desired track by using the corresponding Track Selector and green solo’ing its Monitor icon. Skip over the filler where necessary.
Once you have finished the video tracks, move on to the external audio, which in our case is on A6 and A7. You only need to activate one of the audio track selectors for your external audio. You can do both if you want but it will achieve the same result. When you match back to the source file you will be subclipping all of the audio tracks contained in the file.
By the end of your multigrouping session, your bin should look exactly like this:

If it doesn’t, delete your subclips and start again. Otherwise… continue on.
STEP 9: CREATE YOUR MULTIGROUP [video tutorial link]
Click the Name column and press Command + E to sort the column by Name (Sorting the clips by Name will help keep them from bouncing around the multicam view when you begin editing):

Select all of the subclips in your bin.
It’s now time to perform the most satisfying step… click the “Bin” menu and select “MultiGroup”:

A window will pop up. Make sure it looks like the one below and that you select “Auxiliary TC1” to sync the clips:

Click OK. Another window may pop up warning about multiple angles. Click “Always Group”. Your bin will now look like this, with your multigroup clip at the top of the bin:
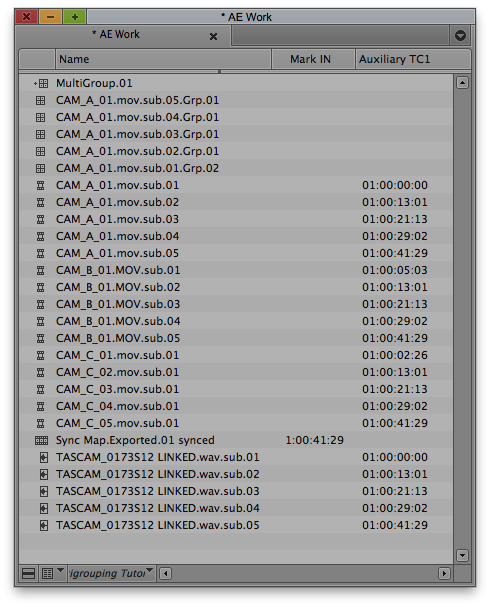
Avid also creates a series of .Grp labeled groups. These are the 5 different groups that comprise the Multigroup. You can delete them as well as the subclips. However, depending on the post workflow of your show, you may want to keep them in a different bin.
Congrats! You’ve just created your first multigroup. You can now cut Multigroup.01 into a sequence and begin editing.
STEP 10: AUTOMATE THE MULTIGROUPING PROCESS [video tutorial link]
As you probably noticed, multigrouping by hand is a tedious and error-prone process. This part of the tutorial will show you how to automate the application of Auxiliary Timecode while multigrouping by using the keyboard macro software of your choice. This will eliminate hours of pain/suffering from your workflow.
PLEASE NOTE: THERE ARE KNOWN ISSUES FOR MOST KEYBOARD MACROS WITH VERSION 8.3 OF MEDIA COMPOSER. The release of MC 8.3.1 solves those issues.
------------ UPDATE -------------
Here is where Noah Chamow's
comprehensive SuperGrouper macro automates this
process even further than the directions below. He offers it for free (though you should donate!)
through his site: http://www.avidsupergrouper.com/
------------------------------------
This part of tutorial is geared towards the Mac version of QuicKeys but the process should be easily recreated in whatever software you are using.
You Will Need:
QuicKeys: http://startly.com/products/quickeys/mac/4/
OR Keyboard Maestro: http://www.keyboardmaestro.com/main/
Both offer free, fully-functional trial versions.
Open your AE Work bin or create a new one. Place your synced sequence inside and make sure it is the ONLY item within the bin:
Now place that bin in the upper left hand corner of the screen.
This is what your upper left hand corner should look like, with your sync map inside your bin:
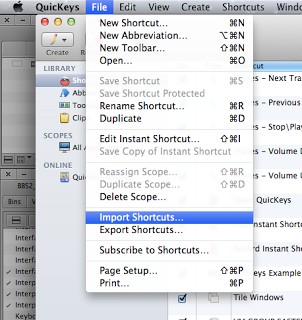
 Open QuicKeys and load the QuicKeys file downloadable here: https://www.dropbox.com/s/bf1n2j6hankb5gm/qk_multigroup_setting.qkmx?dl=0
Double click and open the "QK Multigroup" setting that should appear in your QuicKeys Editor window. Everything you need is laid out in this file. You can scroll through it and see the various steps of the multigrouping process that will be automated.
Now scroll down to Step 15:
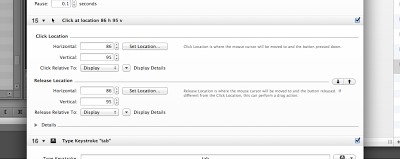
Click “Set Location” and the window below will pop up.
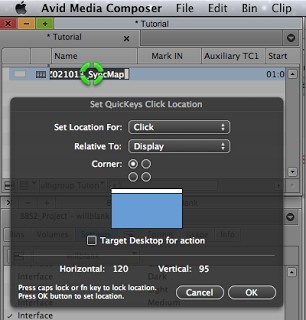
Press the Caps Lock Key with the mouse over the Name Column’s first entry field. Then click OK. Set the Release Location (Also Step 15 in the QuicKeys file) for the same spot.
It’s important that you keep your bin lined up properly in this corner otherwise you will have to redo this step.
Now, very important: you must run this macro one layer at a time, making sure to solo your video tracks. Each layer should look like this as you go, with the green solo button activated (On a Mac, hold down Command and click on the monitor icon):
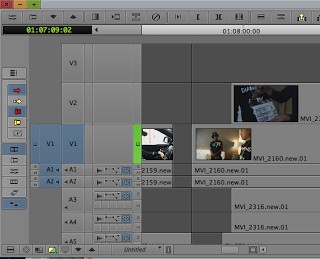
If all of your settings are otherwise correct, you can skip towards the bottom and learn how to activate the macro. Otherwise, read on for a description of exactly what the macro will be doing, step by step:
First, the QuicKeys macro will create a subclip using the multigrouping keystrokes assigned to the numbers 1-6.
After the subclip has been created, Step 15 will click in the name column, then Step 18 (“TAB”) will shift you to the Mark In Column.
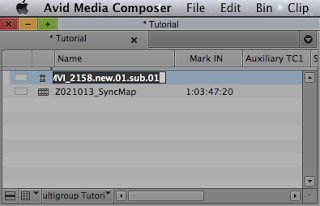

Step 20 (“Shift + Return”) will take you to the bottom of the bin, where your sequence is located.
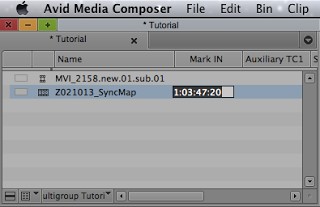
QuicKeys will copy that Mark In value, which will be the basis of your Auxiliary Timecode entries. It will then hit tab again, which will bring you to the Auxiliary TC1 Column.
Then it will press enter, which brings you back up to your subclip, then it will hit paste, which pastes the Mark In value to the subclip’s Auxiliary TC1 Column.

Apple + 0 will bring you back to the timeline, “7” will skip you to the next Add Edit point.
Now go ahead and designate a keystroke to activate the macro. In my case it is F6.
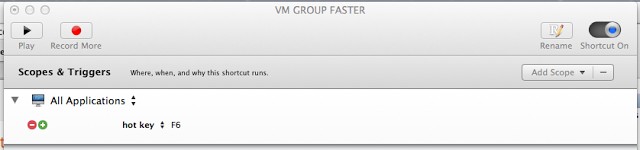
Finally, time to start the process.
NOTE: YOU MUST DEACTIVATE SEGMENT/OVERWRITE TOOLS FOR THE MACRO TO FUNCTION PROPERLY. Otherwise the timeline indicator will get "stuck" on individual clips.
Press F6 (or whatever key you've set) in Avid with your timeline activated. A window will pop up asking you how many times you want it to run. You can count or estimate. Just make sure: if it repeats itself at the end of the sequence because you estimated incorrectly, delete the subclips with identical Aux Timecode.
You'll also end up with Sub-Sequences in your bin. That's what happens over filler with no clip. You can delete those as well. Just make sure, of course, not to delete your Sync Map on accident.
Then voilà, you have automated the process of adding Auxiliary Timecode in Avid!
NOTE: Don't do any audio layers with your video except for Aux TC. If they are polyphonic you just need to do one of those as it subs them all together.
STEP 11: CHECK YOUR MULTIGROUP [video tutorial link]
A quick and dirty method of checking your multigroup is to double click it and open it in the source monitor:

In quad or nine split view you can scrub and see the various angles and how well they match up.
Another technique is to lay it in on top of your sync map (In this example, I’ve made the multigroup clip yellow in order to distinguish it clearly from the rest of the timeline):
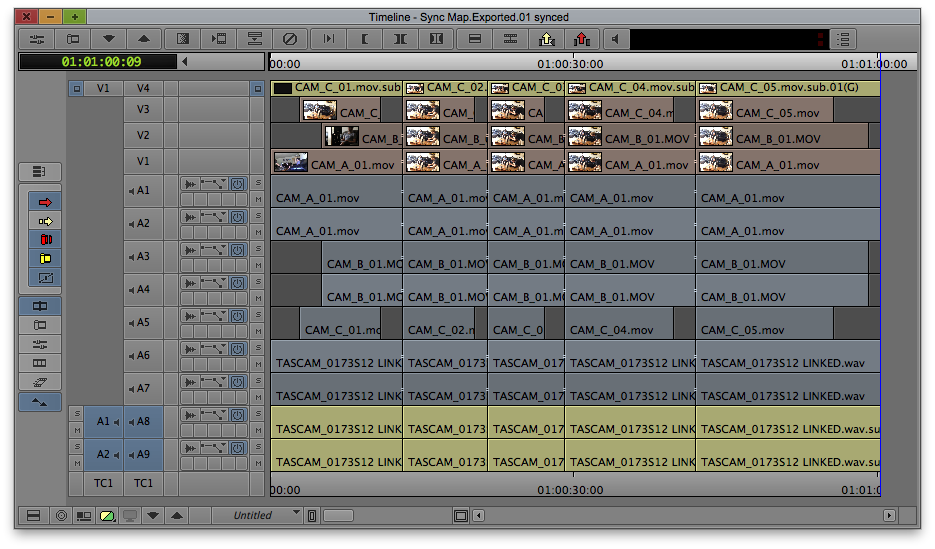
You will be able to clearly see that the multigroup matches up with the Add Edits we created originally. That is an indication of a problem-free multigroup. If they don’t match up, you can check/delete the offending subclips, recreate them and then compile a new multigroup.
If there was filler separating clip groups in your sequence, you will need to remove that filler before cutting the multigroup into the timeline in order to make the add edits match up. When Avid groups clips it automatically removes filler between groups.
YOU’RE DONE
Great work! You just learned one of the most esoteric and essential skills that an AE will need in his or her toolbox.
The one thing that I ask is that if this tutorial has helped you please let me know in the comments!
Otherwise I can be contacted by email: will at willblank dot com
For more about me and my work go to: http://www.willblank.com/
And this interview: http://stilldreamin.podbean.com/e/sd-016-will-blank/
I must warn you though that I cannot troubleshoot your multigroups through the internet. Just understand the process manually, then use the SuperGrouper, which is linked to at the top of the article.
 |
| This is me at work (NBC) |
Thank you!
------------
Other multigrouping resources:
For another multigrouping tutorial please check out this page by Tim Leavitt: http://viewfromthecuttingroomfloor.wordpress.com/2008/04/17/multigroups/
As well as this multigrouping video tutorial by Vincent Rocca: http://www.youtube.com/watch?v=aDR8nRXSTyc
 As a kid, I was obsessed with two things: dinosaurs and video games.


